picky pickers

For fussy little eaters and the parents struggling to feed them!


Leave a comment

Scrummy Mash

Keep things basic for Picky Pickers and gradually add in extra flavours as they become more adventurous. Before long you’ll have them enjoying ‘Grown-Up Mash’ – the ultimate mashed potato in my opinion!

Serves 4 children

Ingredients:

3 medium seized potatoes

Butter

Milk

Salt

Optional: Cheddar chesse and grainy mustard. You could also add some cooked sweetorn, peas or spinach after mashing.

2014-06-30 17.18.06

Method:

1: Peel and cut up the potatoes into small pieces.

2: Boil gently in plenty of salted water until the potatoes are cooked through. This will depend on the size of your potato pices, but 20 minutes should do it.

3: Drain the potatoes.

4: Add a big knob of butter and mash up the potatoes using a potato masher or fork. Slowly add milk until the mash is creamyin texture (about 4 tablespoons should be enough).

5: Continue mashing until the potatoes are completely smooth – Picky Pickers can be VERY unforgiving of lumps! Add more milk and butter if necessary.

6: If making ‘Grown-Up Mash’ add a handful of grated cheddar (you might want to start with mild and build up to mature) and some grainy mustard and mix through.

7: Serve with sausages, fish fingers or steaks and plenty of veg. The mustard and cheese version goes particularly well with sausages and onion gravy!


Leave a comment

Rock Cakes

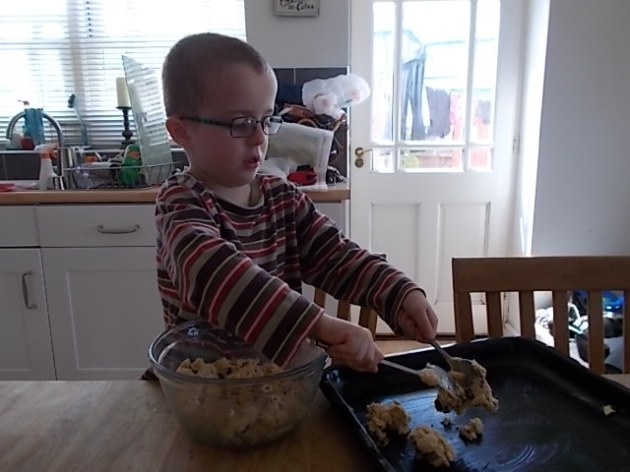
These are seriously scrummy and can be ready to eat in 30 minutes! Little hands will have great fun rubbing in butter, splodging mixture and sprinking sugar!

Makes about 12.

Ingredients:

225g self raising flour
2 teaspoons of baking powder
100g butter
50g granulated sugar
100g raisins
1 egg
1 teaspoon mixed spice
1 tablespoon milk
Demerera sugar for sprinkling!

Method:

1: Pre-heat oven to 200 degrees celsius and lightly grease 2 baking trays.
2: Measure flour and baking powder into a large bowl, add the butter and rub in with your fingertips until the mixture looks like fine breadcrumbs.
3: Stir in the sugar, mixed spice and fruit. Add the egg and the milk and mix to a stiff mixture. If a bit dry add a little more milk.
4: Using 2 tablespoons, shape the mixture into about 12 rough mounds on the prepared baking trays.

Image

5: Sprinkle each cake with demerara sugar.
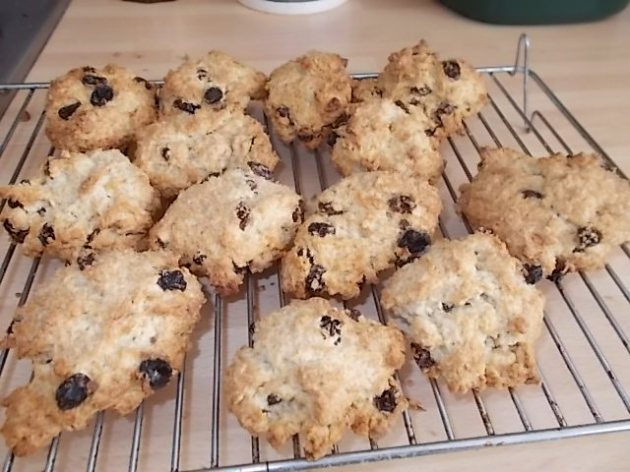
6: Pop in the oven for about 15 minutes, or until golden brown at the edges. Cool on a wire rack before tucking in!

Image


Leave a comment

Cowboy Sausages and Beans

I’m pretty sure this is what actual cowboys have for breakfast. Yes, including the carrot. How else can they be expected to see cattle rustlers sneaking up in the dark?

Serves 4

Ingredients:

8 chipolata sausages or 16 cocktail sausages (more if you have big appetites to feed!)
1/2 a small onion
1 small carrot
2 rashers of streaky bacon, cut into little bits (little helpers can do this using scissors, much easier than a knife!)
a handful of grated cheddar (optional)
1tsp sunflower oil
1 or 2 cans baked beans depending on how much your Picky Pickers like them!
a sprinkle of herbs de provence
lots of toast soldiers

2014-06-23 16.44.25

Method
1: Heat the sunflower oil in a frying pan, add the sausages
2: Finely chop the onion and carrot, add the onion and bacon to the frying pan. Cook until sausages and onions are beginning to brown.

2014-06-23 17.11.43

3: Add the carrot, herbs and 2tbsp of water.
4: Cover and cook for 15 minutes until the carrots are cooked through. Add the cheese if using.
5: Serve with lots of toast soldiers!

2014-06-23 17.27.07

TIP: If your Picky Picker isn’t too keen on beans, just serve a couple to begin with, building up over time. They’re a funny old texture to get used to!


Leave a comment

Frozen Spinach – I’m Sure Popeye Would Approve

Frozen spinach is a firm staple in my kitchen – full of vitamins and iron (although not in an easily absorbable form), it can be popped into so many dishes to add an extra veg kick! As you can add as little or as much as you want to your recipes, the flavour needn’t be overpowering for little palates, and the amount you use can be built up over time.

Although you can’t use it in salads, it’s really handy to have in and because frozen spinach goes through a flash-freezing process that preserves it within hours of being picked, it actually retains more of its vitamin C content than fresh spinach!

I buy the leaf rather than the chopped variety and add it to pizzas, pasta sauces, stews, baby food, risottos… It’s really yummy added to fried up leftover potatoes! One of my favourite uses for frozen spinach is to use it instead of basil to make a pesto sauce.

spinach


Leave a comment

Vanilla Cupcakes

What kid doesn’t like a vanilla cupcake? These are pretty quick to make so I often bake them and leave them plain for my boys to have for pudding, maybe with some jam. If it’s more of an occasion, I’ll make some buttercream icing and start throwing the hundreds and thousands around!
Makes 12
Ingredients:
125g butter (soft, I usually pop it on low in the microwave for a few seconds)
125g caster sugar
125g self raising flour
1 teaspoon baking powder
2 eggs
1 teaspoon vanilla essence
a dash of milk

2014-06-10 14.52.13

Method:
1: Preheat the oven to 180 degrees celsius.
2: Put 12 cupcake cases ready in a cupcake tin.
3: Cream the butter and sugar together until pale and creamy.
4: Sift in the flour and baking powder. Add the vanilla essence and mix together.
5: Add the eggs, one at a time, and mix in before adding the milk. Continue mixing until all combined.
6: Divide the mixture equally between the 12 cases and put in the oven for 12-15 minutes until golden brown.
7: Leave to cool for 10 minutes and then remove from tin and put on a cooling rack.
Variations:
Add a couple of handfuls of chocolate chips or raisins.
Swap the vanilla essence for some lemon juice and zest.

To make these gluten free just substitute in gluten free self-raising flour for the regular self-raising flour. Oh, and don’t forget to check your baking powder us gluten free!

2014-06-10 15.22.33


Leave a comment

Roasted Cauliflower

This is absolutely THE best way to cook cauliflower, and it’s so simple. The crunchy gorgeousness it produces is just fantastic!

Ingredients:

cauliflower florets (ideally fresh, but frozen work pretty well too)

olive oil

sea salt

Method:

1: Preheat the oven to 220 degrees celsius.

2: Put the florets in a single layer into a roasting dish, splash over a little olive oil and some sea salt.

3: Pop in the oven and roast for about 25-30 minutes, stirring at least once, until the cauliflower starts to brown.

4: Take out of the oven and serve. This side dish is lovely as part of a Sunday roast.

DSCN0370


Leave a comment

Tortilla Pizzas

Having a son addicted to any sort of pizza makes me very fond of any easy pizza-type recipes! This one is fantastic for little fingers – give everyone a wrap, pop the passata in a bowl, grate some cheese, chop up some yummy extra toppings, and see what the kids come up with!
Serves 4
Ingredients:
4 tortilla wraps
tomato passata
grated cheese – cheddar and mozzarella work well
fresh basil leaves
a selection of yummy extra toppings – olives, sliced peppers (not green, your child may never forgive you!), mushrooms, cherry tomatoes, tinned sweetcorn, sliced ham, pepperoni……

Method:
1: Preheat the oven to 200 degrees celsius.
2: Put the tortilla wrap on a baking sheet and spread over the tomato passata. Sprinkle over the grated cheese and some basil (I find I can get away with some torn up basil leaves on pizza even with children who recoil at the sight of anything green!).

2014-06-09 17.09.01
3: Add any yummy extras!
4: Bake for 8-9 minutes, until the cheese has melted and the base is crisp. Let the kids cut the pizzas into slices either with a knife and fork or a pizza cutter before they dig in!

2014-06-09 17.20.52


Leave a comment

Roasted Oven Chips

Serves 4 little peeps.
Super yummy and much easier (and healthier) than frying.
Ingredients
2-3 large potatoes
olive oil
sea salt

1: Preheat oven to 200 degrees celsius.
2: Peel potatoes and cut into large chip shapes or bigger wedges if you prefer.
3: Dry chips as much as possible with a clean tea towel – the drier the chip, the crisper they’ll be!
4: Pop a large baking tray in the oven to heat up.
5: Put the chips in a large bowl and drizzle with a tablespoon of olive oil. Add a little sea salt. Mix with your hands to make sure all the chips are nicely coated with oil and salt.
6: Put the chips, as spaced apart as possible, on the hot oven tray and put it back in the oven.
7: Cook for 20-30 minutes depending on the size of the chips until chips are golden brown. I usually check the chips halfway through and wiggle them about a bit in the tray to make sure none stick!
8: Delicious served with roasted chicken pieces, fish fingers or burgers and veggies or salad.


Leave a comment

Howdy!

If anyone knows about dealing with picky or fussy eaters it’s me! I was one myself, and still am in many ways.

Until about the age of 8, my diet mainly consistedof marmite toast or marmite sandwiches, with the occasional pack of ready salted Hula Hoops, apple, smooth apricot yogurt or McDonalds burger and chips thrown in. When I hit my teens, and finally started enjoying such delicacies as roast chicken and lasagne, I decided to become vegetarian! My poor parents must have despaired!

hula hoops

Now, I eat a varied, interesting diet and absolutely love cooking. I’m no longer vegetarian (the lure of bacon was too strong to resist!), but I am careful about the welfare of the animals I eat, and will only buy free-range or organic meat. An outsider would never believe I still have problems with certain foods (‘slimy’ ones in particular).

When I had my children, I saw fussy eating from a whole new perspective! Part of  one of my children’s autism meant that he was extremely finicky about what he’d eat. He would tolerate pasta with either tomato sauce or pesto, but the only hot food he really enjoyed was a margherita pizza. The child wouldn’t even eat chips! It took a long time, and a lot of hard work, to help him to accept the foods in the far more interesting, and balanced, diet he now enjoys.

With another son we faced further difficulties. He may not have loved everything we put on his plate, but he ate it all and had quite broad tastes for a little chap. However, when he was 5 he became ill and was diagnosed with a form of Irritable Bowel Disease. This meant a complete overhaul of his diet until medication could get his symptoms under control: no raw vegetables, no fruit or vegetable skins, no brown bread, very little dairy, and no chocolate or sweet! Add a nut allergy which he developed at the same time, and a trial with him gluten-free, and it was a bit of a nightmare!

As you can see, I really do know first hand how hard it is to help a child accept a new food, especially when unhealthy habits have already been formed, and how tough it can be to be inventive when certain foods have to be restricted or stopped completely. What I hope to do on this blog is provide a wide variety of recipes, which I hope will appeal to children, and which progressively allow for the introduction of new foods into their diet. Often the methods I suggest will involve introducing a taste very gradually, perhaps by adding more ingredients and flavours into a simple recipe over time (plain mashed potato can have cheddar cheese – first mild, building up to mature – grainy mustard and spring onions added to make what I call ‘grown-up mash’ for example). But most of all, the blog is about having fun with food, getting a bit messy and trying out new tastes and cooking styles to find what appeals to your child.

I hope that my recipes, tips and advice will help you to encourage your child, and maybe even yourself, to try cooking and eating lots of lovely new foods together.

Happy munching!!

p.s. Look out at the bottom of my recipes for printable pdf versions of those I think are particularly fun to make with little hands helping!

2014-06-09 17.08.54